Installing AutoIt
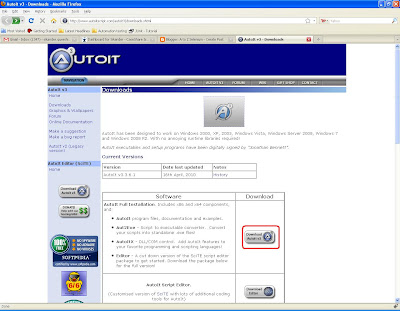
1. Goto following site - http://www.autoitscript.com/autoit3/downloads.shtml
2. Click on the highlighted link shown in the figure and save to your desktop.
 |
Figure: AutoIt down loader link
3. You are ready to start installing AutoIt. Double click on the AutoIt installer file you downloaded. This will begin the installation process.
4. The first window that appears is the welcome screen for the AutoIt installer. This provides you with some basic information about version of AutoIt that you are installing. Click the Next > button when you are ready to continue.
5. The next screen is the licensing agreement. Read through it carefully to ensure that you agree with it. When you are finished reading it, click on I Agree to continue.
6. In the third screen, you are provided with a couple of options. The window is asking you what you want to happen when you double click on a file that has a.au3 extension. Files with .au3 extension are typically scripts written in AutoIt. If you select Run the script, the script dile you have just double clicked will run the contents of the script. If you select Edit the script, the file will open up in your default AutoIt editor.
Once you have decided on the option you would like to use, select it and click on the "Next" button.
7. Next screen will ask you to select "Choose Components". Select "Full" and click on "Next" button.
8. The next window prompts you for a location to install "AutoIt". By default, it selects C:\Program Files\AutoIt3. If you would like to install it somewhere else, you can try it. Once you decide the location of AutoIt, click the Install button to begin the installation.
9. While AutoIt is installing you will see a progress bar indicating how far along the AutoIt installation has progressed.
10. Once the installer has made all of the changed, you will see the final window telling you that AutoIt has successfully installed. Click Finish to complete the installation process. |
No comments:
Post a Comment