Monday, March 21, 2011

Date Function in Java

Getting the current Date-time:
public String getCuurentDateTime(){
DateFormat dateFormat = new SimpleDateFormat("yyyy/MM/dd HH:mm:ss");
Calendar cal = Calendar.getInstance();
String cal2 = dateFormat.format(cal.getTime());
return cal2;

Monday, March 14, 2011

Finding the port number of a SQL Server


There are a couple of ways of finding this information.
1) Using the GUI: In SQL Server 2000, you can use the Server Network Utility and in SQL Server 2005, you can use the SQL Server Configuration Manager.  Look under SQL Server 2005 Network Configuration and look at the TCP port for the TCP/IP protocol.
2)  Check the error log.  You will see an entry like: “Server is listening on [ 'any' <ipv4> 1433].”  The last 4 numbers denote the TCP/IP port number that is being used by that particular instance of SQL Server.
3)  Registry entry: HKLM\Software\Microsoft\MSSQLServer\MSSQLServer\SuperSocketNetLib\TCP
and you will see TCPPort as one of the entries and it’s value represents the port number for that instance.  In case you are using a named instance, then the registry entry will be: HKLM\Software\Microsoft\Microsoft SQL Server\<name of the instance>\MSSQLServer\SuperSocketNetLib\TCP
4) Using the extended stored procedure xp_regread, you can find out the value of the TcpPort by using SQL.  Example:
DECLARE @tcp_port nvarchar(5)
EXEC xp_regread
@rootkey    =    'HKEY_LOCAL_MACHINE',
@key        =    'SOFTWARE\MICROSOFT\MSSQLSERVER\MSSQLSERVER\SUPERSOCKETNETLIB\TCP',
@value_name    =    'TcpPort',
@value        =    @tcp_port OUTPUT
select @tcp_port

Wednesday, March 9, 2011

Data Driven Test Using JUnit


Following steps will guide you how to do data driven tests by using JUnit.

1. Create a Java Project

2. Create a JUnit Test case called "DataDrivenTestUsingJUnit"

3. Add junit and selenium-server jar files to build path

4. Copy the following script and run the test
Figure: Data Driven Test using JUnit

Data Driven Test Using Text file


Following steps will guide you how to do data driven tests by using Text file.

1. Create a Java Project

2. Create a JUnit Test case called "DataDrivenTestUsingTxtfile"

3. Add junit and selenium-server jar files to build path

4. Create a folder called "test-data"

5. Create a text file called test-data.txt" under test-data folder

6. Add followings in test-data.txt file - page design, page updates (one below the other as shown in the following figure)
Figure: Test data in Text file
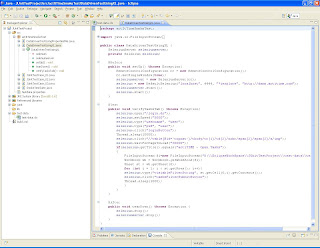
7. Copy the following code and run the test script
Figure: Data Driven Test Using Text file

Data Driven Test Using Excel file


Following steps will guide you how to do data driven tests by using Excel file.

1. Create a Java Project

2. Create a JUnit Test case called "DataDrivenTestUsingXL"

3. Add junit and selenium-server jar files to build path

4. Create a folder called "test-data"

5. Create a excel file called test-data.xls"

6. Under "Sheet1" add the test data as shown below
Figure: Test data in Excel file
7. Copy the following code into your junit test file and run
Figure: Data driven test using excel file


Data Driven Test Using Properties file

Following steps will guide you how to do data driven tests by using .properties file.

1. Create a Java Project

2. Create a JUnit Test case

3. Add junit and selenium-server jar files to build path

4. Now right click on the source folder and select New ->File

5. Enter File name as "testdata.properties" and "Finish" button
Figure: Creating properties file
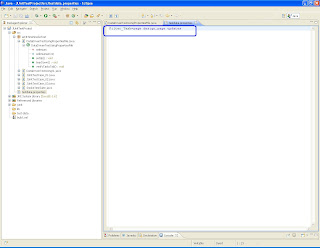
6. Now, double click on "testdata.properties" file and enter the following data - Filter_Task=page design,page updates
Figure: Test data in properties file
7. Now copy the below code from the following figure and run your JUnit test case
Figure: Data Driven Test Using Properties File
Reference: http://kirankanumuri.blogspot.com/2010/10/how-to-do-data-driven-testing.html

Monday, March 7, 2011

Generating JUnit Report

1. Select File menu and click on "Export" option

Figure: Export window
2. Expand "General" node and select "Ant Buildfiles", click on "Next" button

3. Select the project (let all default options), click on "Finish" button
Figure: Ant Buildfiles
4. build.xml file should be created under project folder

5. Now we need to add junit jar file in Ant's "Global Entires"

6. Select "Window" menu, click on "Preferences"

7. In "Preferences" window, expand "Ant" root node, click on "Runtime"

8. Click on "Classpath" tab, expand "Global Entires" 

9. Click on "Add External JARs" button


10. Navigate to your "eclipse" directory (where eclipse is installed). Select "plugins ->org.junit_3.8.2.v3_8_2_v20100427-1100" directory. Select junit.jar file

11. Now right click on build.xml file and select Run As -> Ant Build.."

12. In "Edit Configuration and launch" window, select "build", "SmokeTestSuite" and "junitreprot" checkboxes and click on "Run" button
Figure: Edit Configuration


13. All your test scripts will run and finally report will be generated under the same project directory under "junit" folder

14. Click on "index.html", you will see the report 

Friday, March 4, 2011

Creating Selenium RC - JUnit Test Suite using Eclipse IDE

1. Create JUnit test cases as illustrated here

2. To create a JUnit test suite, right click on the project select New -> Class

3. Enter the class name as SmokeTestSuite and click on "Finish" button

4. Copy the following code and paste in the above class

package actItTimeSmokeTest;

import org.junit.runner.RunWith;
import org.junit.runners.Suite;

@RunWith(Suite.class)
@Suite.SuiteClasses({JUnitTestCase_01.class, JUnitTestCase_02.class, JUnitTestCase_03.class})
public class SmokeTestSuite {
}

5. To run the test suite, right click on the SmokeTestSuite file and select Run As -> JUnit Test

6. The test suite file will run all the 3 tests and gives the results. Following is the JUnit test result for test suite
Figure: JUnit Test Suite Results

Thursday, March 3, 2011

Running a Selenium RC - JUnit Test Case in Eclipse IDE

1. Create a JUnit test case as illustrated here

2. Select the test case which you want to run individually (.java file), right click on it.

3. Select Run As -> JUnit Test (see below figure)
Figure: Running JUnit Test Case
4. The test results can be viewed under JUnit window (see below screen shot)
Figure: JUnit Test Result

Creating a Selenium RC - JUnit Test Case in Eclipse IDE

1. Open Eclipse IDE
2. Create a project
3. Create a package
4. Add JUnit, selenium-server jar files to build path
5. Right click on the project and select New -> JUnit Test Case (as shown in following figure)
Figure: JUnit Test case
6. In the "New JUnit Test Case" window, enter "Source folder", "Package" and "Name". Here name is java class name.
Figure: New JUnit Test Case
7. Now, copy and paste the following code into your test case
Figure: JUnitTestCase_01
8. Similarly, create the following test cases
Figure: JUnitTestCase_02
Figure: JUnitTestCase_03

Wednesday, March 2, 2011

Adding JUnit Library to Eclipse Build Path

1. Download JUnit jar file

2. Open Eclipse IDE

3. Create a Java Project if you have not already created (Refer here)

4. Right click on the project and select "Properties"

5. In "Properties" window, select "Java Build Path" from right side tree

6. Click on "Libraries" tab

7. Click on "Add External Jars" button (See the below figure)
Figure: Build Path
8. Move to the location where junitx.jar file is located and add, click on "OK" button

9. A new node called "Referenced Libraries" must be created and JUnit jar file must be added into that as shown below
Figure: JUnit jar fiel ubder Referenced Libraries
Now, we can write JUnit test case.